Ikhtisar
Sintaks dasar yang diuraikan dalam dokumen desain asli John Gruber menambahkan banyak elemen dokumen sehari-hari, namun hal itu belum cukup bagi sebagian penulis. Oleh karena itu diperlukan sintaks lanjutan.
Beberapa individu dan organisasi melakukan sendiri untuk memperluas sintaks dasar dengan menambahkan elemen tambahan seperti tabel, blok kode, penyorotan sintaks, penautan otomatis URL, dan catatan kaki. Elemen-elemen ini dapat diaktifkan dengan menggunakan bahasa markup ringan yang dibangun berdasarkan sintaks dasar Markdown, atau dengan menambahkan ekstensi ke prosesor Markdown yang cocok.
Ketersediaan
Tidak semua aplikasi Markdown mendukung setiap elemen pada sintaks lanjutan. Anda harus memeriksa apakah bahasa markup ringan pada aplikasi yang (akan) Anda gunakan mendukung elemen sintaks lanjutan. Jika tidak, mungkin Anda dapat mengaktifkan ekstensi di prosesor Markdown Anda.
Bahasa Markup Ringan
Terdapat beberapa bahasa markup ringan yang merupakan superset dari bahasa Markdown. Bahasa tersebut memuat sintaks dasar Gruber dan memperluasnya dengan menambahkan elemen dokumen yang lain seperti tabel, blok kode, penyorotan sintaks, penautan otomatis URL, dan catatan kaki. Banyak aplikasi Markdown paling populer menggunakan salah satu di antara bahasa markup ringan di bawah ini:
Prosesor Markdown
Terdapat lusinan prosesor Markdown. Beberapa di antara prosesor tersebut memungkinkan Anda untuk menambahkan ekstensi untuk mengaktifkan elemen-elemen dokumen dengan sintaks lanjut. Silakan periksa dokumentasi prosesor Anda untuk informasi lebih lanjut.
Tabel
Untuk menghasilkan tabel, gunakan tiga tanda hubung atau lebih (---) untuk membuat judul kolom, dan menggunakan garis tegak (|) untuk memisahkan setiap kolom. Anda dapat secara opsional menambahkan garis tegak di salah satu ujung tabel.
    | Judul kolom 1 | Judul kolom 2 |
    | ------------- | ------------- |
    | Isi baris 1 kolom 1 | Isi baris 1 kolom 2 |
    | Isi baris 2 kolom 1 | Isi baris 2 kolom 2 |
The rendered output looks like this:
| Judul kolom 1 | Judul kolom 2 |
|---|---|
| Isi baris 1 kolom 1 | Isi baris 1 kolom 2 |
| Isi baris 2 kolom 1 | Isi baris 2 kolom 2 |
| Syntax | Description |
|---|---|
| Header | Title |
| Paragraph | Text |
Cell widths can vary, as shown below. The rendered output will look the same.
| Syntax | Description |
| --- | ----------- |
| Header | Title |
| Paragraph | Text |
Alignment
You can align text in the columns to the left, right, or center by adding a colon (:) to the left, right, or on both side of the hyphens within the header row.
    |Isi kolom rata kiri | Isi kolom di tengah |Isi kolom rata kanan|
    | :------------- | :-------------: | ----------:|
    | Isi baris 1 kolom 1 | Isi baris 1 kolom 2 | Isi baris 1 kolom 3 |
    | Isi baris 2 kolom 1 | Isi baris 2 kolom 2 | Isi baris 2 kolom 3 |
The rendered output looks like this:
| Isi kolom rata kiri | Isi kolom di tengah | Isi kolom rata kanan |
|---|---|---|
| Isi baris 1 kolom 1 | Isi baris 1 kolom 2 | Isi baris 1 kolom 3 |
| Isi baris 2 kolom 1 | Isi baris 2 kolom 2 | Isi baris 2 kolom 3 |
| Syntax | Description | Test Text |
|---|---|---|
| Header | Title | Here’s this |
| Paragraph | Text | And more |
Formatting Text in Tables
You can format the text within tables. For example, you can add links, code (words or phrases in backticks (`) only, not code blocks), and emphasis.
You can’t add headings, blockquotes, lists, horizontal rules, images, or HTML tags.
Escaping Pipe Characters in Tables
You can display a pipe (|) character in a table by using its HTML character code (|).
Fenced Code Blocks
The basic Markdown syntax allows you to create code blocks by indenting lines by four spaces or one tab. If you find that inconvenient, try using fenced code blocks. Depending on your Markdown processor or editor, you’ll use three backticks (```) or three tildes (~~~) on the lines before and after the code block. The best part? You don’t have to indent any lines!
```
{
  "firstName": "John",
  "lastName": "Smith",
  "age": 25
}
```
The rendered output looks like this:
{
  "firstName": "John",
  "lastName": "Smith",
  "age": 25
}
Syntax Highlighting
Many Markdown processors support syntax highlighting for fenced code blocks. This feature allows you to add color highlighting for whatever language your code was written in. To add syntax highlighting, specify a language next to the backticks before the fenced code block.
```json
{
  "firstName": "John",
  "lastName": "Smith",
  "age": 25
}
```
The rendered output looks like this:
{
  "firstName": "John",
  "lastName": "Smith",
  "age": 25
}
Footnotes
Footnotes allow you to add notes and references without cluttering the body of the document. When you create a footnote, a superscript number with a link appears where you added the footnote reference. Readers can click the link to jump to the content of the footnote at the bottom of the page.
To create a footnote reference, add a caret and an identifier inside brackets ([^1]). Identifiers can be numbers or words, but they can’t contain spaces or tabs. Identifiers only correlate the footnote reference with the footnote itself — in the output, footnotes are numbered sequentially.
Add the footnote using another caret and number inside brackets with a colon and text ([^1]: My footnote.). You don’t have to put footnotes at the end of the document. You can put them anywhere except inside other elements like lists, block quotes, and tables.
Here's a simple footnote,[^1] and here's a longer one.[^bignote]

[^1]: This is the first footnote.

[^bignote]: Here's one with multiple paragraphs and code.

    Indent paragraphs to include them in the footnote.

    `{ my code }`

    Add as many paragraphs as you like.
The rendered output looks like this:
Here’s a simple footnote,1 and here’s a longer one.2
Heading IDs
Many Markdown processors support custom IDs for headings — some Markdown processors automatically add them. Adding custom IDs allows you to link directly to headings and modify them with CSS. To add a custom heading ID, enclose the custom ID in curly braces on the same line as the heading.
### My Great Heading {#custom-id}
The HTML looks like this:
<h3 id="custom-id">My Great Heading</h3>
Linking to Heading IDs
You can link to headings with custom IDs in the file by creating a standard link with a number sign (#) followed by the custom heading ID.
| Markdown | HTML | Rendered Output |
|---|---|---|
[Heading IDs](#heading-ids) |
<a href="#heading-ids">Heading IDs</a> |
Heading IDs |
Other websites can link to the heading by adding the custom heading ID to the full URL of the webpage (e.g, [Heading IDs](https://www.markdownguide.org/extended-syntax#heading-ids)).
Definition Lists
Some Markdown processors allow you to create definition lists of terms and their corresponding definitions. To create a definition list, type the term on the first line. On the next line, type a colon followed by a space and the definition.
First Term
: This is the definition of the first term.

Second Term
: This is one definition of the second term.
: This is another definition of the second term.
The HTML looks like this:
<dl>
  <dt>First Term</dt>
  <dd>This is the definition of the first term.</dd>
  <dt>Second Term</dt>
  <dd>This is one definition of the second term. </dd>
  <dd>This is another definition of the second term.</dd>
</dl>
The rendered output looks like this:
- First Term
- This is the definition of the first term.
- Second Term
- This is one definition of the second term.
- This is another definition of the second term.
Strikethrough
You can strikethrough words by putting a horizontal line through the center of them. The result looks like this. This feature allows you to indicate that certain words are a mistake not meant for inclusion in the document. To strikethrough words, use two tilde symbols (~~) before and after the words.
~~The world is flat.~~ We now know that the world is round.
The rendered output looks like this:
The world is flat. We now know that the world is round.
Daftar Tugas
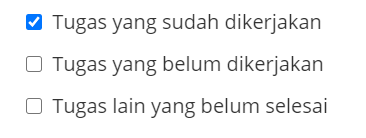
Daftar tugas memungkinkan Anda membuat daftar item dengan kotak centang. Di aplikasi Markdown yang mendukung daftar tugas, kotak centang akan ditampilkan di samping/depan tulisan/teks tugas. Untuk membuat daftar tugas, tambahkan tanda hubungs (-) dan tanda kurung siku ([ ]) di depan tulisan teks tugas/butir. Untuk memilih butir, tuliskan tanda x di dalam tanda kurung siku ([x]).
- [x] Tugas yang sudah dikerjakan
- [ ] Tugas yang belum dikerjakan
- [ ] Tugas lain yang belum selesai
Hasil setelah diproses akan terlihat seperti:
Emoji
There are two ways to add emoji to Markdown files: copy and paste the emoji into your Markdown-formatted text, or type emoji shortcodes.
Copying and Pasting Emoji
In most cases, you can simply copy an emoji from a source like Emojipedia and paste it into your document. Many Markdown applications will automatically display the emoji in the Markdown-formatted text. The HTML and PDF files you export from your Markdown application should display the emoji.
Using Emoji Shortcodes
Some Markdown applications allow you to insert emoji by typing emoji shortcodes. These begin and end with a colon and include the name of an emoji.
Gone camping! :tent: Be back soon.

That is so funny! :joy:
The rendered output looks like this:
Gone camping! ⛺ Be back soon.
That is so funny! 😂
Automatic URL Linking
Many Markdown processors automatically turn URLs into links. That means if you type http://www.example.com, your Markdown processor will automatically turn it into a link even though you haven’t used brackets.
http://www.example.com
The rendered output looks like this:
Disabling Automatic URL Linking
If you don’t want a URL to be automatically linked, you can remove the link by denoting the URL as code with backticks.
`http://www.example.com`
The rendered output looks like this:
http://www.example.com

Tingkatkan keterampilan Markdown Anda
Pelajari Markdown dalam 60 halaman. Dirancang untuk pemula dan ahli, buku Panduan Markdown ini adalah referensi komprehensif yang memiliki semua yang Anda butuhkan untuk memulai dan menguasai sintaks Markdown.
Dapatkan buku tersebutIngin belajar lebih lanjut tentang Markdown?
Jangan berhenti! 😎 Beri tanda bintang situs repositori GitHub, daftarkan alamat e-mail Anda untuk menerima tutorial Markdown yang baru melalui e-mail. Bebas spam!